
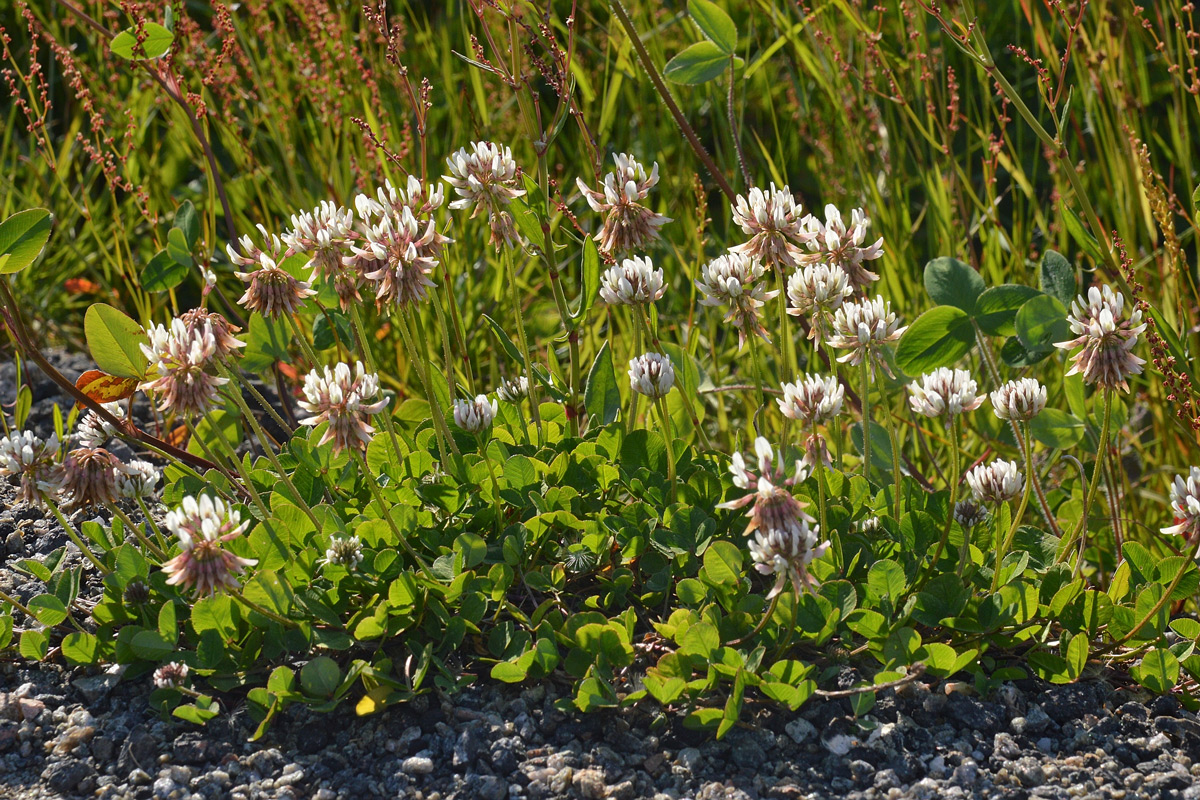
White clover belongs to the legume family and has always been native to Europe. It grows as a creeping plant, forms dense, low carpets via runners and flowers from May to October with pretty white flower heads. These flowers are a feast for honeybees and wild bees alike, because the nectar is easy to reach even for short-tongued species. Dozens of wild bee species and numerous butterflies use it as a food source.
In the vegetable garden, white clover plays a very special role. As a legume, it lives in symbiosis with nodule bacteria (rhizobia), which fix nitrogen from the air and supply it to the soil in a form plants can use. At the same time, it covers the ground completely, suppresses weeds and protects against erosion. Its roots reach down to around 70 cm, loosen compacted layers and improve the soil structure in the long term.
White clover is particularly well known as part of the clover paths in the companion planting system of the Langerhorst family. In this system, a clover strip about 40 cm wide is laid out after every three vegetable rows, serving as a working path and a nitrogen supplier at the same time. The rows and the clover paths move on each year, so that bit by bit the whole bed benefits from the green manure effect. Subterranean clover can be used as an alternative. Find out more in our garden knowledge article.
Facts and figures
Planting & harvest times of White clover
Direct sowing from Early March to Late September. Incorporation takes place around Early February until Late March next year.
Sow White clover
White clover is only ever sown directly into the bed. Scatter the fine seeds broadcast and rake them in only very shallowly, no deeper than 1 to 2 cm, as they need light to germinate.
Sowing is possible from March to September. For use as green manure, August and September are particularly suitable, because the clover can then establish itself well before winter. In the Langerhorst family's system, sowing starts in March as soon as the soil is workable. Germination takes about one to two weeks at temperatures of 15 °C and above. Until then, you should keep the area evenly moist. Allow for around 5 g of seed per square metre.
Location and soil
White clover likes it sunny to partially shaded. In full sun it flowers most abundantly and forms the densest stands, but it also copes with a bit of shade. When it comes to soil, it is more adaptable than its relative, red clover. It feels most at home on nutrient-rich, slightly calcareous, loamy to loamy-sandy soils with a good water supply. It struggles on strongly acidic soils with a pH below 6, so it is worth liming before sowing there. Waterlogging and very dry sandy soils are not its thing either.
Good and bad companions of White clover
White clover is not a classic bed partner that stands row by row alongside vegetables. Its strength lies in serving as ground cover between or next to the crop rows. Heavy feeders such as cabbage, tomatoes, squash and sweetcorn benefit particularly from its company, because it supplies the soil with nitrogen and improves the structure. Research trials have shown that a flowering undersown crop beneath cabbage even confuses the cabbage white butterfly and reduces egg laying.
White clover gets on less well with other legumes such as peas and beans. They share similar nodule bacteria and can harbour common pathogens. The Langerhorst family's books state that clover is so distantly related to beans and peas that hardly any problems arise in practice.
Predecessors and successors of White clover
The greatest strength of white clover in the crop rotation is its effect as a preceding crop for heavy feeders. Cabbage in all its forms, tomatoes, squash, celery and sweetcorn make optimal use of the nitrogen left behind by the clover and the improved soil structure. Medium feeders such as lettuce, carrots, onions and leeks also thrive after a white clover green manure.
Other legumes are problematic as preceding or following crops, as the risk of clover rot (Sclerotinia trifoliorum) increases. A break of several years before the next clover crop on the same area is advisable.
In the Langerhorst family's system, this problem elegantly solves itself, because the clover path moves on by 30 cm every year.
Varieties
White clover comes in different leaf sizes. The small-leaved forms grow particularly low, tolerate foot traffic and are well suited to paths and lawn mixes. Medium-leaved varieties such as 'Haifa' or 'Jura' are a good choice for the vegetable garden, as they are vigorous and robust. The large-leaved variant, known as Ladino clover (var. giganteum), originally comes from northern Italy and needs more warmth than central European gardens usually offer.
For use as a clover path or green manure in the hobby garden, the standard medium-leaved varieties from the shops are recommended. You can get them in any seed shop, which is a practical advantage over subterranean clover, which is harder to source.
Care and fertilising
Once established, white clover is almost maintenance-free. Occasional mowing to no lower than 8 to 10 cm encourages dense growth. In longer dry spells it appreciates a bit of water, even though its roots reach surprisingly deep. You can skip fertilising entirely, the nodule bacteria take care of that. Nitrogen fertiliser would even be counterproductive, as it inhibits the activity of the useful bacteria.
As a clover path in the Langerhorst style, you can lay the pulled clover material directly as mulch between the neighbouring vegetable rows. This way the clover path produces its mulch practically in the middle of the bed. Before winter, hoe off the white clover with an oscillating hoe, as it is hardy and would otherwise simply carry on growing. The hoed-off material stays in place as sheet compost and has largely rotted down by spring.
Diseases and pests
White clover is pleasingly robust. Aphids appear occasionally, but are usually kept in check by ladybirds and other beneficial insects. If needed, a quick cut back helps. The clover flea beetle can occur here and there, but rarely becomes a real problem.
In persistently damp conditions, powdery mildew (whitish coating) or rust fungi (Uromyces trifolii, recognisable by rust-brown pustules) can appear. Avoiding waterlogging helps here. Sooty blotch (Cymadothea trifolii) shows up as black spots on the underside of the leaves, but is usually harmless in the garden.
The most serious disease is clover rot (Sclerotinia trifoliorum). Affected plants die back partially or completely. The most important prevention is a sufficient break of four to five years between clover stands. Only use certified seed and cultivate affected areas deeply, as the sclerotia no longer germinate from a depth of 3 cm.
Harvest and processing
As a green manure, white clover is not harvested in the classic sense. Instead, it is mown and the cuttings used as mulch, or the entire plant mass is worked shallowly into the soil. The best time to incorporate it is shortly before or at the start of flowering, when the nitrogen content of the plant material is at its highest. After working it in, you should wait about two to three weeks before planting again, so that decomposition releases the fixed nitrogen. Clover paths in the Langerhorst style are hoed off before winter and left on the bed as sheet compost. By spring, the material has rotted down and improved the soil structure for the incoming vegetable rows. If you like, you can also use the dried flowers for a mild herbal tea.