
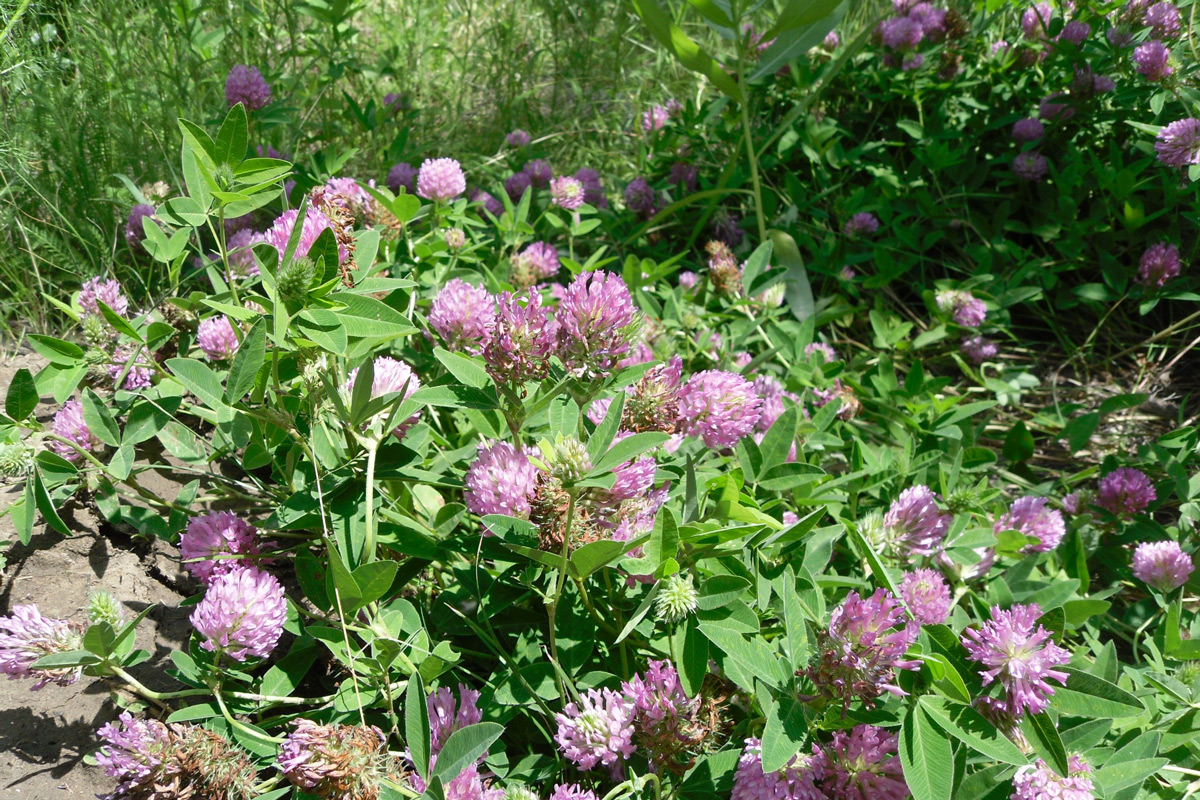
Red clover belongs to the legume family, which makes it a relative of peas, beans and lupins. It thrives in meadows, and that is where most of us know it from. In the vegetable garden, though, it plays a very different role than on grassland. Here, red clover is one of the best green manure plants there is.
What makes it so valuable are tiny helpers on its roots: nodule bacteria of the genus Rhizobium, the ones we find on all legumes. These bacteria capture nitrogen straight from the air and make it available to plants in the soil. Grow red clover one year and you save yourself a lot of fertiliser the next.
On top of that comes a taproot that easily reaches two metres down into the soil. It breaks up compacted layers and brings nutrients up from the depths. Above ground, red clover forms a dense, sweeping cover that leaves weeds almost no chance. From May to September the pink to purple-red flower heads bloom and draw in bumblebees, honeybees and other pollinators. In a four-field rotation in the organic garden, red clover takes on the green manure year before the heavy feeders get their turn.
Important: You have to mow red clover several times a year before the seed ripens, otherwise it will self-seed. More on that in the care section.
Facts and figures
Planting & harvest times of Red clover
Direct sowing from Mid March to Late August. Incorporation takes place around Early March until Late April next year.
Sow Red clover
Red clover only ever goes into the bed by direct sowing. As a green manure it is best broadcast, so simply scatter it evenly across the area. Around 15 to 20 grams per square metre is a good guideline.
Red clover needs light to germinate. The seed should go only 0.5 to 1 cm into the soil, so rake it in very lightly or just press it down. Good contact with the soil is decisive for germination. The easiest way to achieve that is to go over the area with a board or the back of a rake after sowing.
The best sowing time falls between mid-March and mid-August. Spring and early summer sowings give the best results. The soil should be at least 5 °C, with 15 to 20 °C being ideal. If no clover has grown on your plot for a long time, it can be worth inoculating the seed with a nodule bacteria preparation before sowing. That way you make sure the nitrogen symbiosis really gets going.
Location and soil
Red clover likes a sunny to partly shaded spot. Thanks to its deep taproot it copes surprisingly well with longer dry spells. The ideal soil is nutrient-rich and free-draining, and anything from sandy loam to medium-heavy clay loam works well. Red clover hates waterlogging, and it struggles on very sandy, shallow soils or peaty ground.
The pH plays a big part: below 5.5 things get tricky, because nodule bacteria cannot develop properly in acidic conditions. The optimum pH lies between 6.0 and 7.5. If your soil is acidic, work in a little lime before sowing.
Good and bad companions of Red clover
In the vegetable garden, red clover is rarely used as a direct bed partner next to the lettuce. Its strength lies in the green manure rotation or as a broad cover on fallow ground. Even so, there are a few combinations that work well and a few that do not.
In green manure mixtures, red clover pairs beautifully with phacelia (bee's friend). The two flower at slightly staggered times and together provide a long food supply for insects. Red clover also gets on splendidly with grasses: the grasses give support, the clover supplies nitrogen.
All legumes do badly together when they stand close to one another. Peas, beans and lupins share similar pests, diseases and nutrient demands with red clover. Planting them side by side encourages soil fatigue and diseases such as clover rot. Red clover is no good choice next to potatoes either, because wireworms can build up in the soil and go on to damage the potatoes.
Predecessors and successors of Red clover
Crop rotation is the real heart of the matter with red clover. As a preceding crop it leaves behind soil that is enriched with nitrogen and loosened deep down. All heavy feeders benefit from this: brassicas such as white or red cabbage, squash and courgette, or tomatoes and aubergines, all take up the stored nitrogen gratefully. Once the clover is worked in, the nutrients are released in two phases: most of the nitrogen comes free in the first four to eight weeks, after which the root residues raise the humus content over the long term.
What you should definitely avoid: growing other legumes directly before or after red clover. Peas, beans, lucerne and other clover species share the same pathogens. Potatoes as a following crop are also unwise, because wireworms often build up after clover. Between two clover sowings on the same plot you should leave at least three years or more. The reason: the clover rot fungus (Sclerotinia trifoliorum) forms resting bodies that survive in the soil for years.
Varieties
In the shops you will usually find red clover sold as green manure seed without a precise cultivar name. There are real differences, though. Two types are generally distinguished: early red clover, which regrows quickly after cutting and flowers several times, and late red clover with a late but high-yielding flowering. For the home garden, early red clover is the better choice because it is more flexible and flowers for longer.
When buying seed, look for a germination rate above 85 per cent and a purity above 98 per cent. If clover fatigue is already known on your plot, go for cultivars resistant to clover rot. Tetraploid cultivars (with a doubled set of chromosomes) produce larger leaves and coarser stems and cover the soil particularly well. Diploid cultivars grow a little finer.
Care and fertilising
Red clover is remarkably easy to look after. You do not need to feed it, since it makes its own nitrogen. A small dose of phosphorus or potash at sowing can support early development, but that is rarely necessary.
The only critical window is the juvenile phase: red clover grows fairly slowly at first and can be swamped by weeds. A topping cut at around 15 to 20 cm of growth helps the stand establish itself. After that it covers the soil so densely that weeds barely get through.
As a green manure you have to mow the clover regularly before the seed ripens. It flowers in its first summer already and would otherwise set enough seed to establish itself permanently in the bed. So cut it back as soon as about half the flower heads are in full bloom but the pods have not yet ripened. Since red clover shoots again from the crown after cutting, you typically repeat this twice over the green manure year: a first cut in early summer and a second in late summer. Spread the cuttings on the surface as mulch or work them in shallowly. Only at the end of the green manure year, in autumn or the following spring, do you finally work in the whole stand, again before the seed ripens.
At least three to four weeks should pass between this final incorporation and the new sowing or planting. If you use the clover as a mulch supplier for neighbouring vegetable rows, pull or cut it regularly and spread the cuttings straight there.
One important note for anyone using the mixed culture system of the Langerhorst family: the clover paths used there are laid out with white clover, not red clover. Red clover does not tolerate treading and is therefore unsuitable for paths you walk and kneel on regularly.
Diseases and pests
The most significant disease of red clover is clover rot, caused by the fungus Sclerotinia trifoliorum. In autumn, inconspicuous black spots first appear on leaves and shoots. Over winter a whitish fungal web spreads, affected plants wilt and die off. The fungus forms black resting bodies (sclerotia) that can stay infectious in the soil for over six years. The only effective prevention is a long enough growing break of at least four to six years, plus certified seed and resistant cultivars where possible.
Anthracnose (Colletotrichum trifolii) can attack the stems, but appears far less often on resistant cultivars. Powdery mildew (Erysiphe polygoni) shows up occasionally as a white coating on the leaves, above all in damp, cool spells. Stem nematodes (Ditylenchus dipsaci) build up in the soil when clover is grown too often. With a nematode infestation, only an extended break of eight years helps.
Leaf weevils and root weevils can feed on leaves and roots, but they are rarely a serious problem in the home garden. Now and then clover dodder (Cuscuta epithymum) turns up, a parasitic plant. Remove affected patches generously.
Harvest and processing
For the final incorporation, mow the clover shortly before or during flowering, chop the material up and work it in shallowly, only 5 to 10 cm deep, with a digging fork or rake, so the mass can rot down aerobically. Between the final incorporation and replanting you should wait two to three weeks in summer, and up to six weeks in spring or autumn, because decomposition goes more slowly at lower temperatures. If you like, you can also use the young leaves and flowers in the kitchen. The leaves taste mild and nutty, the flowers slightly sweet. Both work well in salads, herb quark or smoothies. For sprouts there is special sprouting seed on the market, ready to harvest after five to eight days in the sprouting jar. Ordinary green manure seed is not suitable for that, though.