
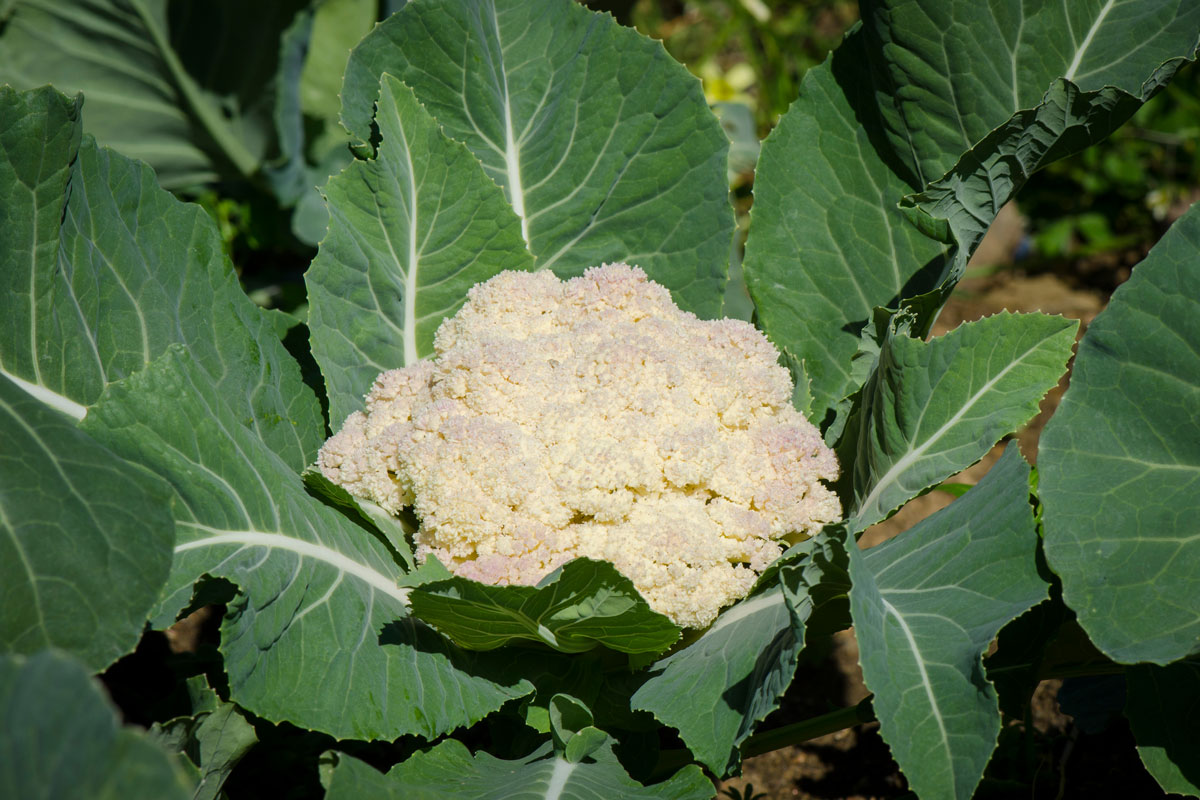
Cauliflower is rightly considered the king of the brassica family. Its mild, almost nutty flavour makes it popular even with people who normally steer clear of cabbage. What we harvest is actually the unopened flower head of the plant, the so-called "curd". It sits nestled among large, blue-green leaves on a short, sturdy stem.
Besides the classic white cauliflower, there are now yellow, green and purple varieties that bring colour to your plate. A special variant is Romanesco with its fascinating spiral-shaped florets.
Cauliflower is low in calories but packed with vitamin C, vitamin K, calcium, magnesium and valuable mustard oils.
Facts and figures
Planting & harvest times of Cauliflower
SummerDirect sowing from Mid April to Late June. Transplant to bed from Early April to Late July. Pre-grow about 30 days before transplanting, approximately between Early March and Late June. After a growing period of 80 days, harvest can begin around Early June and continues until Late October.
WinterDirect sowing from Mid July to Mid August. Transplant to bed from Mid August to Mid September. Pre-grow about 30 days before transplanting, approximately between Mid July and Mid August. After a growing period of 290 days, harvest can begin around Early May and continues until Late May next year.
Sow and plant Cauliflower
Cauliflower is best started as a young plant indoors and then transplanted into the bed. The pre-cultivation takes at least 30 days. You can start sowing indoors as early as February. Just cover the seeds lightly with soil. The optimal germination temperature is 18 °C. Once they've germinated, grow them on much cooler, at around 12 °C. After about two weeks, prick out the seedlings. Before planting out, harden them off for a few days.
Between April and July, young plants can go into the bed. If frost is still a risk, protect the plants with fleece. Direct sowing into the bed is possible from mid-April to the end of June, but in practice it's not quite as reliable as transplanting young plants.
For overwintering, plant the young plants out between mid-August and mid-September. Make sure you use winter-hardy varieties.
Space them 50 cm apart in the row. Plant the cauliflower deep enough so the soil reaches the cotyledons. A bit of lime in the planting hole helps prevent clubroot. A handful of horn shavings makes a good slow-release fertiliser.
Location and soil
When it comes to choosing a spot, cauliflower is quite fussy. It thrives best in a sunny position, though light shade during the hottest hours of the day is fine. Very sunny, dry spots don't suit it well.
Soil preparation is key to success. The soil should have a loose structure and be deep enough for the roots to develop properly. The soil's ability to retain moisture is particularly important. Loamy soil meets this requirement perfectly. The soil should also be rich in humus, as cauliflower is one of the most nutrient-hungry vegetables.
An often underestimated factor is the lime content. A pH value between 6 and 7 significantly reduces the risk of the dreaded clubroot. Generous compost additions of around 5 litres per square metre prepare the bed perfectly and meet the high nutrient demands of this demanding crop.
Good and bad companions of Cauliflower
In mixed planting, cauliflower gets on especially well with celery. The two help each other out. In the first planting plan in Gertrud Franck's book, cauliflower and celery share a row: the celery is meant to keep the cabbage white away, and the cauliflower protects the celery from celery rust.
Because cauliflower only needs plenty of room later on, lettuces make ideal companions in the first half of the year. Butterhead lettuce between the young plants covers the soil and is said to keep flea beetles off the cabbage, while lamb's lettuce and a ring of radishes are harvested just as quickly. Sister Christa Weinrich sows spinach into the rows in March and later hoes it in as a mulch between the cabbage plants. Peas and dwarf French beans also get along with it, and the beans even germinate well in the shade of the big leaves. Beetroot, carrots and tomatoes work alongside it too. Gertrud Franck even finds space for early cauliflower between the tomato plants, which are meant to keep cabbage pests at bay. Dill, borage, pot marigold and marigolds along the edge attract beneficial insects, while thyme and sage are said to confuse cabbage pests with their scent.
Potatoes are not ideal neighbours, though early potatoes lifted in good time barely cause any trouble. Garden cress is better sown on its own. Nasturtium is itself a food plant for cabbage white caterpillars, and nobody knows for certain whether it takes the pressure off the cauliflower or draws the butterflies in first. Other brassicas next to cauliflower are no problem, as long as you keep them apart in your crop rotation.
- Pest control through scent or camouflage
- Pest control through scent or camouflage
- Pest control through scent or camouflage
- Pest control through scent or camouflage
- Practical tip for this pair
- Pest control through scent or camouflage
- Pest control through scent or camouflage
- Practical tip for this pair
- Practical tip for this pair
- Attracts beneficial insects
- Pest control through scent or camouflage
- Practical tip for this pair
- Practical tip for this pair
- Pest control through scent or camouflage
- Practical tip for this pair
- Pest control through scent or camouflage
- Practical tip for this pair
- Practical tip for this pair
- Practical tip for this pair
- Pest control through scent or camouflage
- Practical tip for this pair
- Pest control through scent or camouflage
- Pest control through scent or camouflage
- Practical tip for this pair
- Pest control through scent or camouflage
- Pest control through scent or camouflage
- Practical tip for this pair
- Allelopathy, growth inhibition
Predecessors and successors of Cauliflower
Like all cabbage family crops, cauliflower should only return to a spot used by other brassicas after four years. That gap keeps rotation diseases such as clubroot in check. Black rot also survives in old cabbage stumps, so dig the stumps out after harvest or chop them up well. The best preceding crops for hungry cauliflower are peas, beans and other legumes, whose nitrogen it puts to good use.
Cauliflower also grows well after onions, garlic, shallots, courgettes, sweetcorn, tomatoes, peppers or celery, because they share no diseases with it. Leave four years after beetroot and chard, which suffer from the beet cyst nematode just as cabbages do, and bear in mind that leeks and spinach also build up this eelworm.
Cauliflower harvested early leaves a well supplied bed in summer for endive or lamb's lettuce, and parsnips or leeks fit in the following year. Carrots, scorzonera, salsify and lettuce grow less well after cabbage, and onions turn soft after all the crop residues and store badly. For green manure you can also use phacelia or legumes.
Mustard as a green manure before brassicas is often discouraged, but Gertrud Franck sees it differently, since in her system the whole bed is sown with yellow mustard at the end of the year. Although both are brassicas, the relationship is so distant that there are probably no negative effects.
For green manure you can also use phacelia or legumes.
- Nitrogen release
- Nitrogen release
- Nitrogen release
- Nitrogen release
- Nitrogen release
- Nitrogen release
- Nitrogen release
- Nitrogen release
- Both host the same nematode species
- Shared soil-borne pathogen
- Shared soil-borne pathogen
- Shared soil-borne pathogen
- Shared soil-borne pathogen
- Shared soil-borne pathogen
- Both host the same nematode species
- Shared soil-borne pathogen
- Shared soil-borne pathogen
- Self-incompatibility
- Shared soil-borne pathogen
- Self-incompatibility
- Shared soil-borne pathogen
- Self-incompatibility
- Shared soil-borne pathogen
- Self-incompatibility
- Shared soil-borne pathogen
- Shared soil-borne pathogen
- Self-incompatibility
- Shared soil-borne pathogen
- Self-incompatibility
- Shared soil-borne pathogen
- Self-incompatibility
- Shared soil-borne pathogen
- Shared soil-borne pathogen
- Shared soil-borne pathogen
- Self-incompatibility
- Shared soil-borne pathogen
- Self-incompatibility
- Shared soil-borne pathogen
- Self-incompatibility
- Shared soil-borne pathogen
- Self-incompatibility
- Shared soil-borne pathogen
- Shared soil-borne pathogen
- Shared soil-borne pathogen
- Self-incompatibility
- Loosens soil, improves soil structure
- Weed suppression for the next crop
- Shared soil-borne pathogen
- Shared soil-borne pathogen
- Shared soil-borne pathogen
- Too much nitrogen for a sensitive successor
- Shared soil-borne pathogen
- Shared soil-borne pathogen
- Shared soil-borne pathogen
- Too much nitrogen for a sensitive successor
- Both host the same nematode species
- Shared soil-borne pathogen
- Shared soil-borne pathogen
- Self-incompatibility
- Shared soil-borne pathogen
- Self-incompatibility
- Shared soil-borne pathogen
- Self-incompatibility
- Shared soil-borne pathogen
- Self-incompatibility
- Shared soil-borne pathogen
- Shared soil-borne pathogen
- Self-incompatibility
- Shared soil-borne pathogen
- Self-incompatibility
- Shared soil-borne pathogen
- Self-incompatibility
- Shared soil-borne pathogen
- Shared soil-borne pathogen
- Shared soil-borne pathogen
- Self-incompatibility
- Shared soil-borne pathogen
- Self-incompatibility
- Shared soil-borne pathogen
- Self-incompatibility
- Shared soil-borne pathogen
- Self-incompatibility
- Shared soil-borne pathogen
- Shared soil-borne pathogen
- Shared soil-borne pathogen
- Self-incompatibility
Varieties
There's a decent selection of cauliflower varieties that differ in head shape, colour and planting time. For getting started with this already somewhat demanding plant, 'Neckarperle' and 'Erfurter Zwerg' are good choices.
If you want to bring colour to the bed, try purple varieties like 'Di Sicilia Violetto' or choose the bright orange 'Sunset' for autumn growing.
For earlier or later planting times, there are special varieties — it's worth taking a closer look. For overwintering in milder regions, there are cultivars that can withstand frosts down to minus 12 degrees.
Care and fertilising
Right after planting, the young plants need a good watering. After that, water more sparingly for about three weeks so the roots grow deep into the soil. If cauliflower doesn't get enough water, the heads stay small or the plant bolts prematurely.
Diluted nettle feed or horn shavings work well for feeding during the growing season.
To stop the cauliflower head turning yellowish, it needs some sun protection. If the inner leaves don't fold over the curd on their own, simply snap a few over to provide shade.
An important point for head formation: at the four to eight leaf stage, the plant needs temperatures around 12 °C for about ten days. Without this cooling phase, no head will form. That's why growing in a warm greenhouse usually doesn't work.
Diseases and pests
Sadly, cauliflower is not only popular with us humans but also with all sorts of pests. Cabbage white caterpillars, cabbage root fly, cabbage whitefly and flea beetles can make your gardening life hard. The best prevention is a fine-mesh insect net that you stretch over the plants right after planting.
The swede midge is a particularly nasty pest. It lays its tiny eggs deep between the developing flower buds. You can spot affected plants by their twisted heart leaves. Growing in open, breezy spots and using close-mesh nets with a 0.8 mm mesh size help to prevent it.
Black rot is another disease dreaded on cauliflower. This bacterial disease causes yellow to brown V-shaped patches starting at the leaf edge, and the leaf veins turn black. It arrives with the seed or survives in old cabbage stumps and spreads in warm, wet weather through splashing water. Use healthy seed, water from below and clear away the stumps after harvest.
The slime mould Plasmodiophora brassicae causes clubroot. The signs are stunted growth and bluish discoloured or yellowing leaves. If you suspect it, dig up a root and check: it will show white, tuber-like swellings. If it really is clubroot, lift the whole plant with its roots straight away and put it in the household waste. Not on the compost, or you will spread the fungus further. From then on you need a break of at least 7 years for all brassicas on that spot. Add extra lime to raise the pH value.
Harvest and processing
About two to three months after planting, the cauliflower is ready to harvest. The right moment has come when the head is well developed and firm, but the individual florets haven't yet opened. Don't wait too long, or the plant will start to bolt and the curd becomes loose and bitter.
Open the bed planner Try free for 7 days, web, iOS and Android